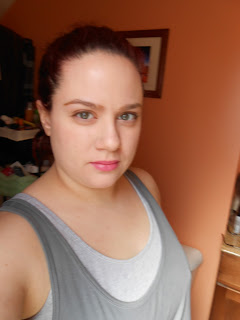
Makeup 101: Contouring
One of the most difficult makeup concepts to get right is
contouring. I admit I’m still not great at it. Now when I say “contouring” I
mean any product that adds depth and dimension to the face, such as blush, bronzer,
contour, and highlighter.
Step 1: Tools of the Trade
When applying products intended to warm up the skin (blush
and bronzer), use a large fluffy brush like one intended for powder to apply
and blend. If you use a cream product, apply with your fingers and blend with
the fluffy brush. It will be much easier to get a flawless finish with a large
brush.
 |
| Real Techniques Blush Brush |
When applying contour and highlight, use a brush with more
concentrated bristles. Contouring
products are meant to be precise rather than a wash of color.
 |
| Real Techniques Contour Brush |
 |
| Real Techniques Eyeshadow and Crease Brushes |
Step 2: Choosing Colors
When choosing bronzer, look for one that’s more pink than
red. It looks more natural on EVERY skin tone.
 |
| Wet n' Wild Color Icon Bronzer (Bikini Contest) |
 |
| right side of Wet n' Wild MegaGlow Contour Palette (Dulce de Leche) |
For a daytime highlight, use a matte color. For evening, you
can go for one with a little shimmer. Pick a champagne tone for lighter skin
and a gold tone for deeper tones.
|
| Left Side of Wet n' Wild MegaGlow Contour Palette (Dulce de Leche) |
 |
| Physicians Formula Highlight Pearls |
 |
| Physicians Formula Butter Highlighter (Champagne) |
When picking a cheek color, skin tone and undertone need to
be considered. When choosing the shade, lighter skin tones should go with a
lighter color, and darker skin tones should go brighter to make sure the blush
doesn’t blend in with the skin. If you
have cooler skin, a pinky tone works great. If you have a warmer undertone, use
a peachy/coral tone.
 |
| Nyx Blushes Cool Tones (top row, left to right) Hamptons, Mauve n' on Out, Electro Warm tones (bottom row, left to right) Pink the Town, Coraline, Double Dare |
Step 3: Application
If you’re lucky enough to have very defined bone structure,
blush can be applied right at the apples of the cheeks (the part of your cheeks
that’s the widest when you smile).
 |
| Where to apply blush if you have very defined bone structure and pronounced cheekbones |
If you have round cheeks or skin that’s a little on the
mature side, place it right on the cheekbones and blend it backwards toward the
hairline above your ear.
 |
| Where to apply blush if you have a round face or mature skin |
Bronzer is applied in the shape of a 3 starting in the
center of the forehead, to under the cheekbones, and then under the chin. You can also use it on the tip of your nose. The objective is to put it on the "high points" of the face. This means where the sun would hit you first if you were laying down sunbathing. DO
NOT put bronzer everywhere. You WILL look like an Oompa Loompa.
 |
| Where to apply bronzer (you can also put it on the tip of the nose) |
Contour is applied directly under the cheekbone in a
concentrated line and then blended back.
It can also be used wherever you want to diminish the appearance of something,
like a wider nose or a wider chin.
Highlight is applied right above the cheekbone under the eyes. It can also be used under the eyebrows and down the nose (stopping before the tip of the nose).
Highlight is applied right above the cheekbone under the eyes. It can also be used under the eyebrows and down the nose (stopping before the tip of the nose).
 |
| Where to apply highlight and contour shades |
Next Tutorial Tuesday, I’ll get back to creating some pretty
makeup looks for you. Spring is officially here, so get ready for some bright
and bold colors!


Comments
Post a Comment